An automatic login system using the IndusBoard (ESP32) that simulates a USB HID keyboard to automatically enter credentials and log into a system at the press of a button.
This project is sourced from another site, not written by us — this list is our best match of their components against what we stock, not a verified bill of materials. Always check the original blog (linked above) for the actual parts list before buying.
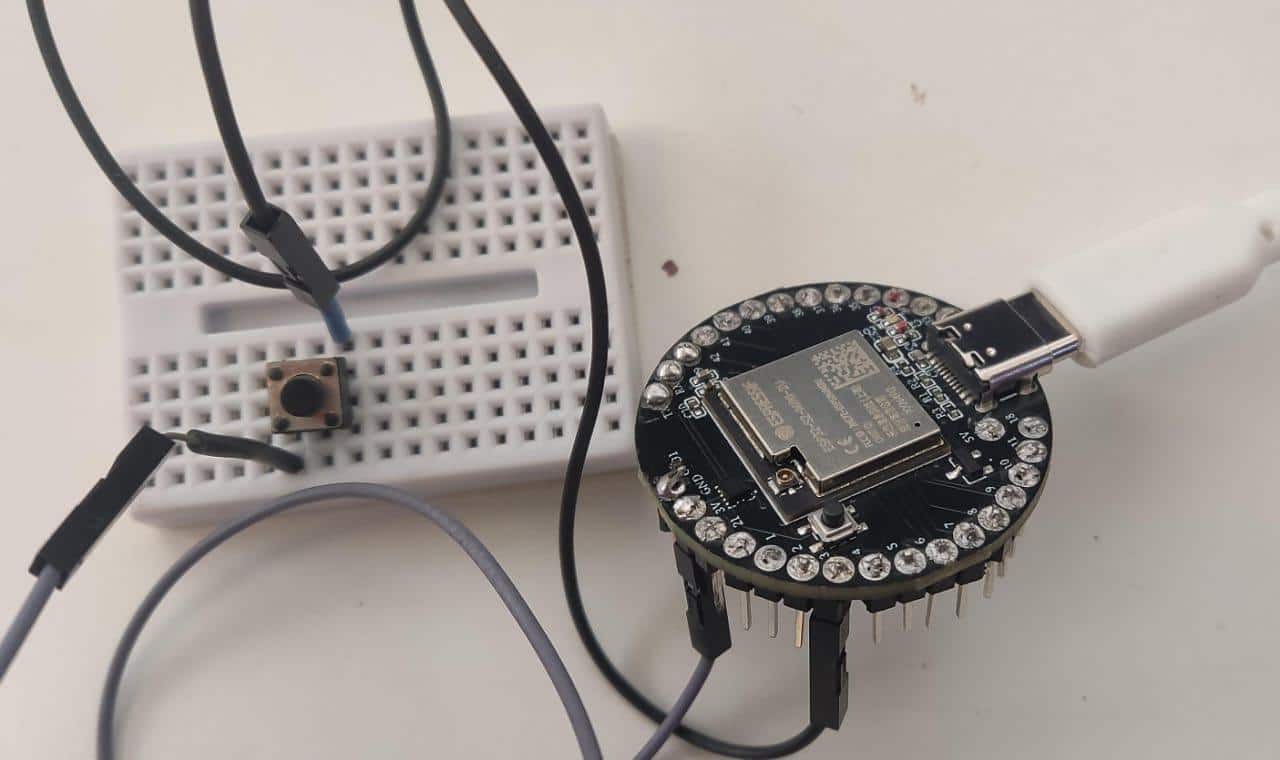
The Automatic Login System operates by leveraging the native USB HID (Human Interface Device) capabilities of the ESP32 microcontroller embedded within the IndusBoard Coin. When you press the connected 2-pin pushbutton, it pulls a designated digital input pin on the IndusBoard low or high, depending on your pull-up or pull-down configuration. This physical button press triggers an interrupt or a polled state change inside the microcontroller's firmware, written via the Arduino IDE. Upon detecting this valid press event, the ESP32 transitions from an idle state into a pre-programmed execution routine. Instead of acting as a traditional peripheral, the microcontroller uses its USB stack to emulate a standard USB keyboard plugged directly into a host computer. It then streams a pre-defined sequence of keystrokes over the data lines—simulating typing your username, password, or any automated command string—essentially executing a rapid keystroke injection. Because the host computer recognizes the IndusBoard Coin as a standard human interface device, it accepts the incoming data string instantly, bypassing the need for manual typing. The small 3.5 cm x 4.5 cm breadboard serves as the compact physical mounting and wiring hub for the pushbutton, securely connecting it to the necessary GPIO and ground pins of the 3cm IndusBoard Coin.
Why Build This
Accelerate workstation access and streamline repetitive login procedures during software development or testing phases.
Gain practical undergraduate-level experience in microcontroller USB Human Interface Device (HID) emulation and keystroke injection techniques.
Build a foundational physical security trigger mechanism that can later be expanded to integrate with RFID readers or biometric scanners.
Real-World Application
Can be used for quickly logging into workstations, automating repetitive login procedures, or integrating with physical security hardware like RFID readers and biometric scanners for office or home entry.
Skills You'll Learn
USB HID protocol emulation
microcontroller GPIO programming
pushbutton debouncing
digital input state detection
automated script execution
Safety Precautions
No specific precautions noted for this build — always follow general electronics safety practices.
Technology Tags
ESP32
USB HID
ARDUINO IDE
C++
AUTHENTICATION
AUTOMATION
HARDWARE SECURITY
Frequently Asked Questions
The IndusBoard Coin utilizes the ESP32's built-in USB capabilities to emulate a standard USB keyboard, allowing it to send pre-programmed keystrokes directly to the host computer when triggered.
Yes, you can easily modify the credential strings within the source code in the Arduino IDE and re-flash the ESP32 whenever your login details change.
The 3.5 cm x 4.5 cm breadboard provides a secure mounting platform for the 2-pin pushbutton, which acts as the physical trigger to initiate the automated login sequence when pressed.
Gallery
This page is part of Kitkraft's Project Hub — a curated collection of electronics & robotics projects gathered from the maker community to help students and hobbyists discover and learn to build. Kitkraft does not claim authorship of the original project, and makes no representation as to the accuracy, completeness or safety of third-party source material. The summary and "How It Works" explanation above are AI-generated, rewritten with reference to the original tutorial — not a reproduction of it. Full credit and a direct link to the original source are provided above. If you're the original creator and have a concern about how your work is represented here, please contact us and we'll address it promptly.
Kitkraft Project Hub — curated from the maker community, credited at the source.
 MB102 Adjustable Breadboard Power Supply Module (3.3V & 5V) for Arduino & Raspberry Pi
Rs. 139.00
 2-Slot 18650 Holder with Protective Cover and On/Off Switch – Case
Rs. 109.00
 400 Points Mini Solderless Prototype PCB Breadboard High Quality
Rs. 89.00
 Jumper Wire 10 Pin Male To Male 20cm
Rs. 45.00
 Jumper Wire 10 Pin Male To Female 20cm
Rs. 45.00


