Build an ESP32 GSM Calling Device with Auto Answer Using GeoLinker
Project Hub
/IoT & Connected Devices/Asset Tracking & GPS/Build an ESP32 GSM Calling Device with Auto Answer Using GeoLinker
Intermediate
ESP32
₹1,500 – ₹5,000
3 – 6 Hours
Partial Kit
Build an ESP32 GSM Calling Device with Auto Answer Using GeoLinker
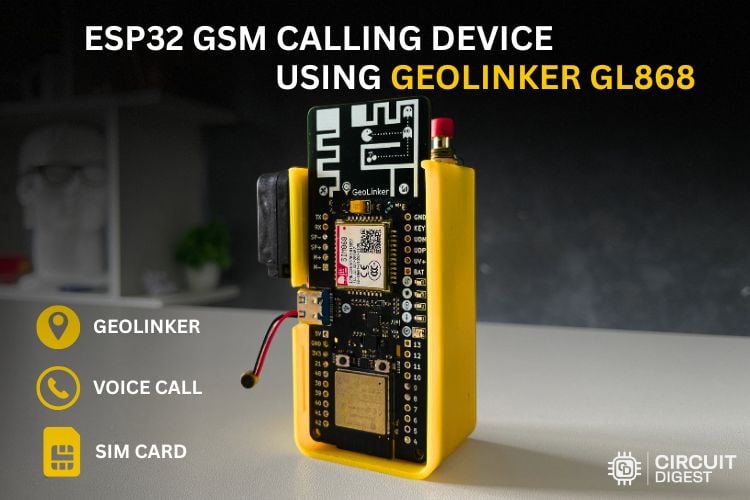
Build a complete GSM voice calling device using the GeoLinker GL868 board featuring push-button outgoing calls and automatic answering for incoming calls.
This project is sourced from another site, not written by us — this list is our best match of their components against what we stock, not a verified bill of materials. Always check the original blog (linked above) for the actual parts list before buying.
This project creates a portable wireless voice communication device by integrating an ESP32 microcontroller with a GeoLinker GL868 cellular development board. The ESP32 DevKit v1 acts as the central processing unit, running code written via the Arduino IDE and utilizing the specific GL868_ESP32 Arduino library to command the cellular module. For power, the system relies on a 3.7V lithium battery connected via a JST connector, ensuring stable current delivery during high-power cellular network operations. Voice input and output are handled by an analog condenser microphone and a 4-ohm speaker respectively, converting acoustic sound waves into electrical audio signals and vice-versa through the GL868's audio interface. A push button is wired to the ESP32 to trigger manual outgoing phone calls. Meanwhile, the software constantly monitors the cellular module for incoming calls, utilizing an auto-answer routine to pick up incoming connections automatically without manual intervention. By combining standard microcontroller digital inputs with cellular AT commands processed through the serial or library interface, the device bridges local user inputs and audio transducers with a global GSM network, utilizing standard 2G SIM cards for cellular connectivity and mobile network registration.
Why Build This
Develop a functional wireless intercom or emergency calling device suitable for elderly care and safety applications.
Gain practical experience interfacing microcontrollers with cellular GSM hardware modules for voice communication.
Implement automated telephony routines like auto-answer features for unattended security or remote monitoring systems.
Real-World Application
Can be used as a GSM-based emergency calling device for elderly care, a wireless intercom system, security alarm auto-dialer, or industrial alert communication system.
Skills You'll Learn
GSM cellular communication
AT command handling
microcontroller audio interfacing
lithium battery power management
digital input handling via push buttons
Arduino library integration
Safety Precautions
Ensure a fully charged 3.7V Li-ion battery is connected via the JST connector, as USB power alone may not supply sufficient current during cellular transmission and dialing.
Technology Tags
ESP32-S3
SIM868
GSM
GPRS
GPS
AT COMMANDS
IOT
CLOUD
ARDUINO
Frequently Asked Questions
Cellular network transmissions, especially when dialing or establishing voice calls, demand sudden high peak currents that standard USB computer ports often cannot provide, which can cause the ESP32 to reset. The lithium battery supplies the necessary peak current stability.
No, the GeoLinker GL868 board is designed around a 2G cellular module and requires a compatible 2G SIM card, as modern 4G/5G-only SIMs may not register on legacy 2G networks depending on your region's telecom infrastructure.
The ESP32 runs custom software using the GL868_ESP32 library that continuously monitors the module's connection status. When an incoming call ring is detected, the program automatically sends the appropriate command to pick up the call without needing a button press.
Gallery
This page is part of Kitkraft's Project Hub — a curated collection of electronics & robotics projects gathered from the maker community to help students and hobbyists discover and learn to build. Kitkraft does not claim authorship of the original project, and makes no representation as to the accuracy, completeness or safety of third-party source material. The summary and "How It Works" explanation above are AI-generated, rewritten with reference to the original tutorial — not a reproduction of it. Full credit and a direct link to the original source are provided above. If you're the original creator and have a concern about how your work is represented here, please contact us and we'll address it promptly.
Kitkraft Project Hub — curated from the maker community, credited at the source.
 1200mAh 18650 Li-ion Bat – Reliable 3.7V Power Cell
Rs. 129.00
 2-Slot 18650 Holder with Protective Cover and On/Off Switch – Case
Rs. 109.00
 Jumper Wire 10 Pin Male To Male 20cm
Rs. 45.00
 400 Points Mini Solderless Prototype PCB Breadboard High Quality
Rs. 89.00
 MB102 Adjustable Breadboard Power Supply Module (3.3V & 5V) for Arduino & Raspberry Pi
Rs. 139.00
 Jumper Wire 10 Pin Male To Female 20cm
Rs. 45.00


