Build Digital Cracker using Arduino and JQ6500 MP3 Module
Project Hub
/Automotive EV & Transportation/EV Battery Management System (BMS)/Build Digital Cracker using Arduino and JQ6500 MP3 Module
Intermediate
ARDUINO
Project Specific
3 – 6 Hours
Partial Kit
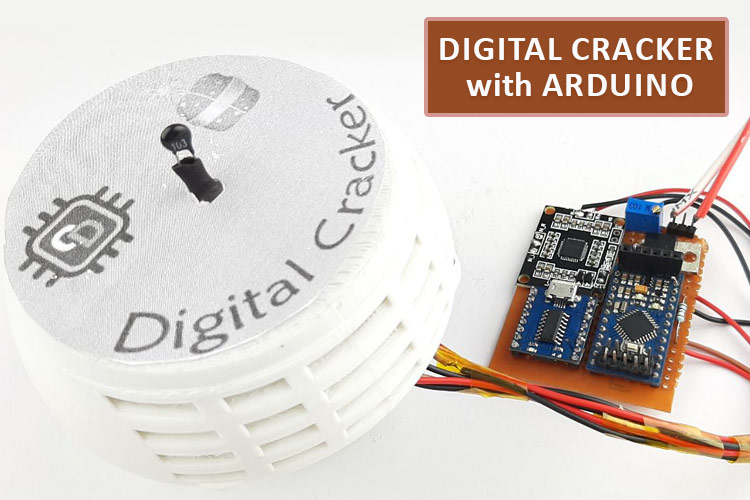
Build Digital Cracker using Arduino and JQ6500 MP3 Module
Build a safe, electronic digital firecracker using an Arduino, thermistor sensor, audio module, and NeoPixel LEDs to simulate festive fireworks without air or noise pollution.
This project is sourced from another site, not written by us — this list is our best match of their components against what we stock, not a verified bill of materials. Always check the original blog (linked above) for the actual parts list before buying.
This electronic digital firecracker system simulates the sensory experience of traditional fireworks safely and without pollution by combining microcontroller logic, temperature sensing, digital audio playback, addressable lighting, and amplification. At the core of the system is an Arduino Pro Mini or Nano, which continuously monitors an analog input from a thermistor circuit. When a user triggers the system—such as by applying heat or observing a programmed temperature threshold change—the Arduino initiates the sequence. It commands the JQ6500 Voice Sound Module to stream pre-loaded audio files representing firecracker sounds. This audio signal is routed into a PAM8610 Class-D Audio Amplifier, which efficiently drives an external speaker at high volumes. Simultaneously, the Arduino utilizes the Adafruit_NeoPixel library to output precise data signals to a chain of WS2812B NeoPixel LEDs. These programmable RGB LEDs burst into bright, dynamic color patterns that mimic the visual flashes of real pyrotechnics. Powering the entire architecture is a 12V Li-Po Battery Pack equipped with an onboard Battery Management System (BMS). Because the logic components require lower voltages, a 7805 Voltage Regulator steps down the 12V supply to a stable 5V rail for the Arduino, audio module, and LEDs. A potentiometer can also be integrated into the analog inputs to adjust parameters like timing thresholds or display brightness. Through this coordinated interplay of hardware and software, the circuit successfully translates physical sensor data into a synchronized, multi-sensory digital display.
Why Build This
Design eco-friendly, pollution-free alternatives to traditional pyrotechnics for festive celebrations and public events.
Gain practical undergraduate-level experience integrating microcontrollers with digital audio playback and high-current addressable lighting.
Explore sensor-based triggering mechanisms by interfacing analog thermistors with microcontroller firmware logic.
Real-World Application
Eco-friendly festive celebrations, pollution-free alternatives to traditional fireworks, interactive sensory displays, and educational demonstrations of sensor-based triggering.
Skills You'll Learn
Analog sensor interfacing
Class-D audio amplifier integration
Addressable LED data timing
Voltage regulation design
Microcontroller firmware development
Safety Precautions
Exercise standard electronic precautions when working with 12V lithium battery packs and voltage regulators.
Technology Tags
ARDUINO
JQ6500 MP3 MODULE
PAM8610 AUDIO AMPLIFIER
WS2812B NEOPIXEL LEDS
THERMISTOR
AUDIO
LIGHTING
Frequently Asked Questions
Yes, an Arduino Uno uses the same microcontroller family and can run the exact same code and libraries, though its physical footprint is larger.
The JQ6500 typically features a built-in USB interface or requires a serial connection to transfer MP3 audio files directly onto its internal flash memory.
The 7805 safely steps down the higher 12V voltage from the Li-Po battery pack to a stable 5V supply required by the Arduino, audio module, and NeoPixel LEDs.
Gallery
This page is part of Kitkraft's Project Hub — a curated collection of electronics & robotics projects gathered from the maker community to help students and hobbyists discover and learn to build. Kitkraft does not claim authorship of the original project, and makes no representation as to the accuracy, completeness or safety of third-party source material. The summary and "How It Works" explanation above are AI-generated, rewritten with reference to the original tutorial — not a reproduction of it. Full credit and a direct link to the original source are provided above. If you're the original creator and have a concern about how your work is represented here, please contact us and we'll address it promptly.
Kitkraft Project Hub — curated from the maker community, credited at the source.
 Jumper Wire 10 Pin Male To Male 20cm
Rs. 45.00
 400 Points Mini Solderless Prototype PCB Breadboard High Quality
Rs. 89.00
 MB102 Adjustable Breadboard Power Supply Module (3.3V & 5V) for Arduino & Raspberry Pi
Rs. 139.00
 Jumper Wire 10 Pin Male To Female 20cm
Rs. 45.00


