Intermediate
ARDUINO
Project Specific
3 – 6 Hours
Digital Pressure Gauge
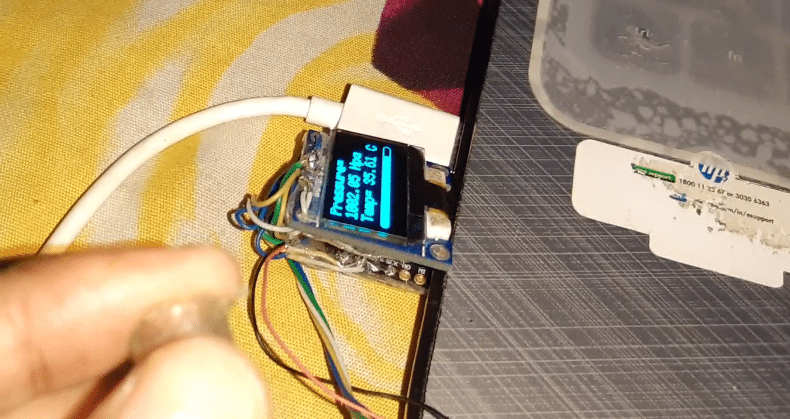
This project guides you through building a digital pressure gauge using a BMP sensor and an OLED display, powered by an Arduino.
Originally published by Ashwini Sinha on ElectronicsForU
View original tutorial
How It Works
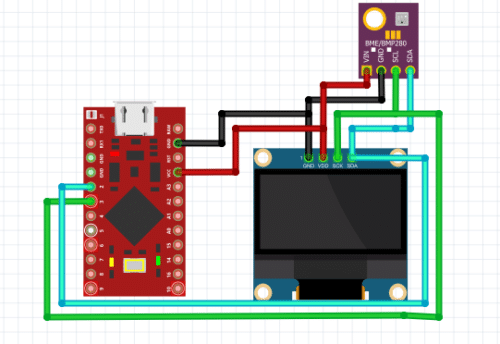
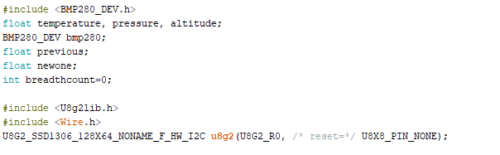
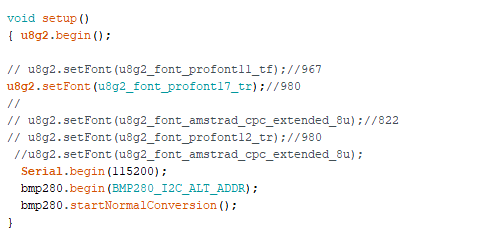
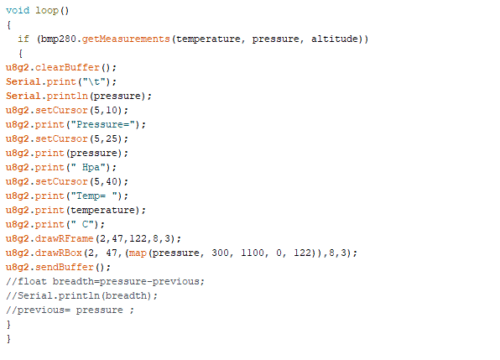
The Digital Pressure Gauge project centers around an Arduino Uno microcontroller that coordinates data acquisition and visual output. At the heart of the sensing subsystem is the BMP280 sensor, which measures atmospheric pressure and temperature through its internal piezoresistive pressure sensing element. The Arduino Uno communicates with the BMP280 sensor and the OLED display using standard communication protocols over connecting wires, fetching raw pressure data from the sensor's registers. Once the microcontroller processes these numerical values, it utilizes the U8g2lib and BMP280 software libraries inside the Arduino IDE environment to render human-readable metrics onto the compact OLED display. Power is supplied to the entire circuit via a 5V DC battery, ensuring the system remains portable. As environmental pressure changes—whether due to weather fluctuations or altitude shifts—the BMP280 detects the minute variations, allowing the Arduino to instantly update the numerical readouts displayed on the screen.
Why Build This
Develop a functional atmospheric monitoring tool applicable to drone telemetry, pipeline air-flow detection, and localized meteorological tracking.
Gain hands-on engineering experience integrating I2C-based digital sensors and graphical display modules with an embedded microcontroller.
Strengthen software development capabilities by implementing third-party hardware libraries in the Arduino IDE to process and visualize real-time physical data.
Real-World Application
Weather prediction, detecting air flow movement through pipelines, and obtaining altitude position with the help of a drone.
Skills You'll Learn
I2C communication protocol
sensor data processing
OLED display rendering
library integration in Arduino IDE
embedded system power management
Safety Precautions
No specific precautions noted for this build — always follow general electronics safety practices.
Technology Tags
ARDUINO
BMP280
OLED
I2C
SENSORS
PRESSURE MEASUREMENT
TEMPERATURE MEASUREMENT
Ready to build this?
We stock the boards, sensors and modules this project needs. A full parts list is coming soon — for now, browse our DIY Kits & components or search for Arduino parts.
Frequently Asked Questions
Can I power this project using a standard USB computer connection instead of the 5V DC battery?
Yes, powering the Arduino Uno via a USB cable from your computer provides the necessary 5V and also allows you to upload code and view serial debugging information simultaneously.
Why is the OLED display not showing any text after I uploaded the code?
This usually happens if the I2C wiring (SDA and SCL pins) is incorrect or if the specific display constructor in your U8g2lib code does not match the exact hardware model of your OLED screen.
Do I need to calibrate the BMP280 sensor before taking pressure readings?
The BMP280 comes with factory-calibrated internal compensation registers, so raw data read through the library is already adjusted for high accuracy without manual calibration.
Gallery
Kitkraft Project Hub — curated from the maker community, credited at the source.
PRJ-00221