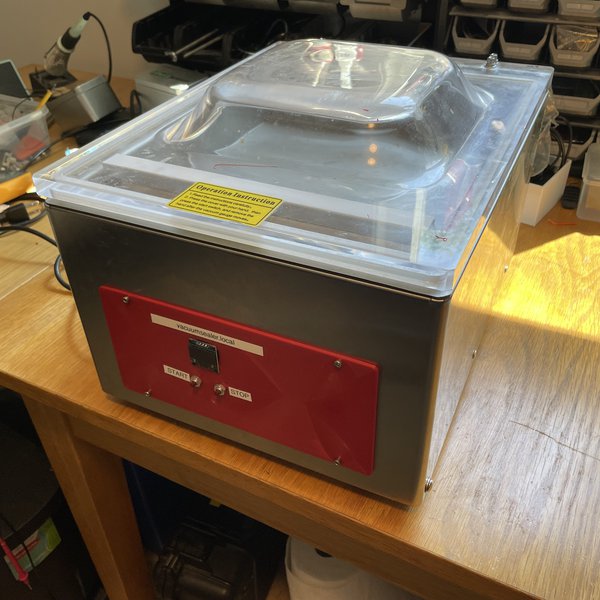
An ESP32-based replacement controller for a commercial vacuum sealer featuring closed-loop pressure monitoring, state-machine cycle management, and a local WiFi web interface.
This project is sourced from another site, not written by us — this list is our best match of their components against what we stock, not a verified bill of materials. Always check the original blog (linked above) for the actual parts list before buying.
The ESP32 Vacuum Sealer Controller operates as an automated, closed-loop embedded system that manages the entire vacuum sealing and heat-sealing cycle. At the heart of the system is the ESP32 DevKit v1 microcontroller, which runs a state-machine firmware developed in the Arduino IDE or ESP-IDF framework. Connected via the I2C communication bus are two primary peripherals: the Adafruit MPRLS Absolute Pressure Sensor (0-170 kPa) and the SSD1306 0.96-inch 128x64 OLED display. The pressure sensor continuously samples the chamber pressure, feeding real-time metric data back to the ESP32 so it can evaluate whether the target vacuum level has been achieved. The SSD1306 display provides local visual feedback, rendering real-time system states, pressure curves, and countdown timers. Based on the current state of the finite state machine, the ESP32 issues digital control signals to a 4-channel relay module featuring 5V opto-isolation. These opto-isolated relays serve as an electrical barrier, allowing the low-voltage logic circuitry of the ESP32 to safely command high-power electromechanical loads. Specifically, the relays actuate 120VAC solenoid valves to control airflow into and out of the chamber, and power the high-current sealing heating bar for precise thermal bonding of the packaging material. Additionally, the ESP32's built-in WiFi radio hosts a local web interface, enabling remote monitoring, parameter adjustment, and cycle initiation directly from a browser.
Why Build This
Modernize outdated or broken commercial kitchen packaging machinery by replacing failing proprietary electronics with an open, programmable IoT controller.
Gain hands-on engineering experience designing closed-loop feedback control systems that interface precision digital sensors with high-power industrial actuators.
Implement local web-based telemetry and monitoring dashboards running directly on an edge microcontroller for remote industrial process management.
Real-World Application
Repairing and modernizing commercial kitchen equipment, food preservation, and packaging machinery using IoT microcontrollers.
Skills You'll Learn
I2C bus communication
closed-loop pressure sensing and feedback control
finite state machine firmware architecture
opto-isolated relay interfacing with high-voltage loads
local web server hosting on microcontrollers
Safety Precautions
This project involves switching 120VAC mains voltage directly with relays to control solenoid valves and heating elements. Exercise extreme caution, ensure proper enclosure insulation, and disconnect power before servicing.
Technology Tags
ESP32
WIFI
I2C
PRESSURE SENSOR
OLED DISPLAY
RELAY MODULE
STATE MACHINE
WEB INTERFACE
Frequently Asked Questions
The system relies on the Adafruit MPRLS absolute pressure sensor, which measures the atmospheric pressure inside the chamber and communicates those readings digitally to the ESP32 via I2C for real-time comparison against a target threshold.
The 4-channel relay module uses optical coupling to electrically isolate the sensitive 3.3V/5V logic of the ESP32 from the high-power 120VAC mains circuits driving the solenoid valves and heating bar, preventing electrical noise and catastrophic damage.
Yes, the ESP32 features onboard WiFi capability, allowing you to host a local web interface that you can access from any device on the same network to view status metrics and trigger cycles.
Gallery
This page is part of Kitkraft's Project Hub — a curated collection of electronics & robotics projects gathered from the maker community to help students and hobbyists discover and learn to build. Kitkraft does not claim authorship of the original project, and makes no representation as to the accuracy, completeness or safety of third-party source material. The summary and "How It Works" explanation above are AI-generated, rewritten with reference to the original tutorial — not a reproduction of it. Full credit and a direct link to the original source are provided above. If you're the original creator and have a concern about how your work is represented here, please contact us and we'll address it promptly.
Kitkraft Project Hub — curated from the maker community, credited at the source.
 GY-BMP280-3.3 HIGH PRECISION ATMOSPHERIC PRESSURE SENSOR MODULE
Rs. 69.00
 0.96 Inch I2C/IIC 4pin OLED Display Module White
Rs. 349.00
 5V 1 Channel Relay Module
Rs. 45.00
 400 Points Mini Solderless Prototype PCB Breadboard High Quality
Rs. 89.00
 MB102 Adjustable Breadboard Power Supply Module (3.3V & 5V) for Arduino & Raspberry Pi
Rs. 139.00
 Jumper Wire 10 Pin Male To Male 20cm
Rs. 45.00
 Jumper Wire 10 Pin Male To Female 20cm
Rs. 45.00


