Gesture-Controlled Contactless Switch with Code and Circuit
Project Hub
/Audio Displays & Interactive Media/LED Matrix & Cube Displays/Gesture-Controlled Contactless Switch with Code and Circuit
Intermediate
ARDUINO
Project Specific
3 – 6 Hours
Partial Kit
Gesture-Controlled Contactless Switch with Code and Circuit
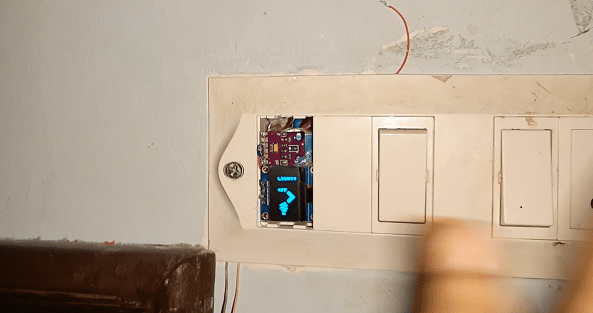
Create a touch-free smart switch using an Arduino and an APDS-9960 gesture sensor to operate domestic appliances like lights and fans via hand gestures.
This project is sourced from another site, not written by us — this list is our best match of their components against what we stock, not a verified bill of materials. Always check the original blog (linked above) for the actual parts list before buying.
The Gesture-Controlled Contactless Switch operates by integrating optical sensing, microcontroller processing, and electromechanical switching to control external devices without physical contact. At the heart of the system is the APDS-9960 gesture sensor, which communicates with the Arduino board via the I2C protocol. This sensor utilizes integrated infrared directional photodiodes to detect ambient light and reflect infrared energy off nearby objects, such as a user's hand. When a specific motion—like a swipe left, right, up, or down—is performed above the sensor, the device measures the varying directional intensity of the reflected light and converts it into motion data. The Arduino runs code compiled through the Arduino IDE using the Adafruit APDS9960 library to continuously poll the sensor and interpret these gesture coordinates. Once a valid directional gesture is recognized, the microcontroller changes the digital output state of one of its pins. This pin is connected to the signal input of a relay module. The relay module contains an electromagnetically operated switch that acts as a physical gatekeeper for high-power circuits. When triggered by the low-voltage DC signal from the Arduino, the relay coil energizes, switching its internal mechanical contacts to either open or close the connected AC or DC load circuit, thereby turning connected domestic appliances like lights and fans on or off.
Why Build This
Develop hands-free interface solutions applicable to modern smart home automation and hygiene-sensitive environments.
Implement assistive technology control systems designed to aid users with limited physical dexterity.
Bridge low-voltage digital microcontroller logic with high-voltage electromechanical power switching components.
Real-World Application
Smart home automation, touch-free appliance control for hygiene, and assistive technology for hands-free operation.
Skills You'll Learn
I2C communication protocols
optical sensor data interpretation
microcontroller digital output control
relay module interfacing
electromechanical power switching
Safety Precautions
Exercise extreme caution when wiring the relay module to high-voltage AC mains wiring (lights and fans) to avoid electric shock.
Technology Tags
ARDUINO
APDS-9960
GESTURE SENSOR
RELAY MODULE
SMART HOME
HOME AUTOMATION
TOUCH-FREE SWITCH
Frequently Asked Questions
No, the Arduino operates on low-voltage DC and cannot directly switch high-voltage AC mains power. You must use an intermediate relay module to safely isolate the low-voltage control logic from the high-voltage appliance circuit.
You need the Arduino IDE to write and upload the code, along with the Adafruit APDS9960 library installed to properly interpret raw data from the gesture sensor.
The sensor emits infrared light using an internal LED and measures the amount of light reflected back onto its directional photodiodes. By tracking how the light reflection shifts across different diodes over time, the sensor determines the direction of the hand swipe.
Gallery
This page is part of Kitkraft's Project Hub — a curated collection of electronics & robotics projects gathered from the maker community to help students and hobbyists discover and learn to build. Kitkraft does not claim authorship of the original project, and makes no representation as to the accuracy, completeness or safety of third-party source material. The summary and "How It Works" explanation above are AI-generated, rewritten with reference to the original tutorial — not a reproduction of it. Full credit and a direct link to the original source are provided above. If you're the original creator and have a concern about how your work is represented here, please contact us and we'll address it promptly.
Kitkraft Project Hub — curated from the maker community, credited at the source.
 5V 1 Channel Relay Module
Rs. 45.00
 Jumper Wire 10 Pin Male To Male 20cm
Rs. 45.00
 400 Points Mini Solderless Prototype PCB Breadboard High Quality
Rs. 89.00
 MB102 Adjustable Breadboard Power Supply Module (3.3V & 5V) for Arduino & Raspberry Pi
Rs. 139.00
 Jumper Wire 10 Pin Male To Female 20cm
Rs. 45.00


