This project is sourced from another site, not written by us — this list is our best match of their components against what we stock, not a verified bill of materials. Always check the original blog (linked above) for the actual parts list before buying.
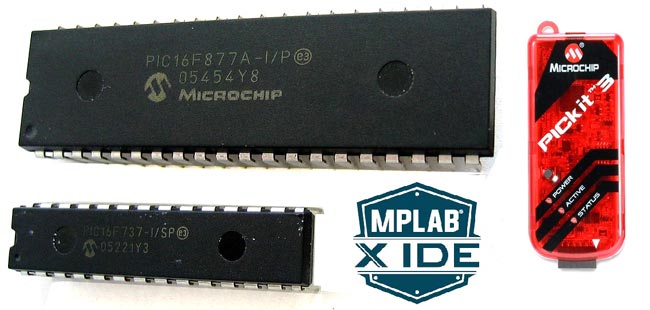
This project serves as a foundational introduction to developing embedded systems using a PIC microcontroller. At the center of the hardware setup is the PIC microcontroller (such as the PIC16F877A), which is mounted on a breadboard and interconnected using connecting wires to establish basic power distribution and programming lines. Because microcontrollers cannot execute high-level code directly, the system relies on the PICkit 3 Programmer/Debugger, a hardware interface tool that bridges your computer and the microcontroller. Through this physical connection, compiled binary instructions are transferred from your development workspace into the microcontroller's non-volatile flash memory. On the software side, the MPLABX Integrated Development Environment (IDE) acts as the primary workspace where you write, edit, and manage your source files. To translate this human-readable code into machine instructions that the PIC core can process, the environment utilizes the XC8 Compiler. Once the code is compiled and flashed onto the microcontroller, the device begins executing the instructions independently, managing its input/output pins, timing, or peripheral logic as defined by the software program. Through this closed-loop cycle of writing code in MPLABX, compiling it via XC8, flashing it using the PICkit 3, and observing the hardware behavior on the breadboard, you establish a complete, standard workflow for embedded systems engineering.
Why Build This
Establish a foundational understanding of hardware-software integration required for undergraduate engineering design courses.
Master the standard industry workflow for flashing, debugging, and programming mid-range microcontroller architectures.
Gain practical debugging competencies using professional tools like the MPLABX IDE and XC8 compiler.
Real-World Application
Used in industrial automation, consumer electronics, and automotive embedded control systems.
Skills You'll Learn
Embedded C programming
microcontroller architecture
hardware debugging
Integrated Development Environment (IDE) navigation
firmware compilation and flashing
Safety Precautions
No specific precautions noted for this build — always follow general electronics safety practices.
Technology Tags
PIC MICROCONTROLLER
MPLABX IDE
EMBEDDED SYSTEMS
MICROCHIP
Frequently Asked Questions
Often, the PICkit 3 programmer can provide target power to the breadboard during the debugging and programming phase, though you should verify current limits for your specific setup.
The MPLABX IDE is the interface where you write and manage your project files, while the XC8 compiler specifically translates your C code into the machine language that the PIC microcontroller understands.
While the workflow supports many 8-bit PIC devices, you must ensure that your specific microcontroller model is selected in your MPLABX project settings and is fully compatible with the XC8 compiler.
Gallery
This page is part of Kitkraft's Project Hub — a curated collection of electronics & robotics projects gathered from the maker community to help students and hobbyists discover and learn to build. Kitkraft does not claim authorship of the original project, and makes no representation as to the accuracy, completeness or safety of third-party source material. The summary and "How It Works" explanation above are AI-generated, rewritten with reference to the original tutorial — not a reproduction of it. Full credit and a direct link to the original source are provided above. If you're the original creator and have a concern about how your work is represented here, please contact us and we'll address it promptly.
Kitkraft Project Hub — curated from the maker community, credited at the source.
 Jumper Wire 10 Pin Male To Male 20cm
Rs. 45.00
 MB102 Adjustable Breadboard Power Supply Module (3.3V & 5V) for Arduino & Raspberry Pi
Rs. 139.00
 400 Points Mini Solderless Prototype PCB Breadboard High Quality
Rs. 89.00
 Jumper Wire 10 Pin Male To Female 20cm
Rs. 45.00


