Lithium Ion Battery Management and Protection Module (BMS) Teardown - Schematics, Parts List and Working
Project Hub
/Automotive EV & Transportation/EV Battery Management System (BMS)/Lithium Ion Battery Management and Protection Module (BMS) Teardown - Schematics, Parts List and Working
Advanced
ANALOG / DISCRETE
Project Specific
3 – 6 Hours
Partial Kit
Lithium Ion Battery Management and Protection Module (BMS) Teardown - Schematics, Parts List and Working
A comprehensive teardown, schematic analysis, and operational guide for a 4S 40A Lithium-Ion Battery Management System (BMS) module commonly used with 18650 cells.
This project is sourced from another site, not written by us — this list is our best match of their components against what we stock, not a verified bill of materials. Always check the original blog (linked above) for the actual parts list before buying.
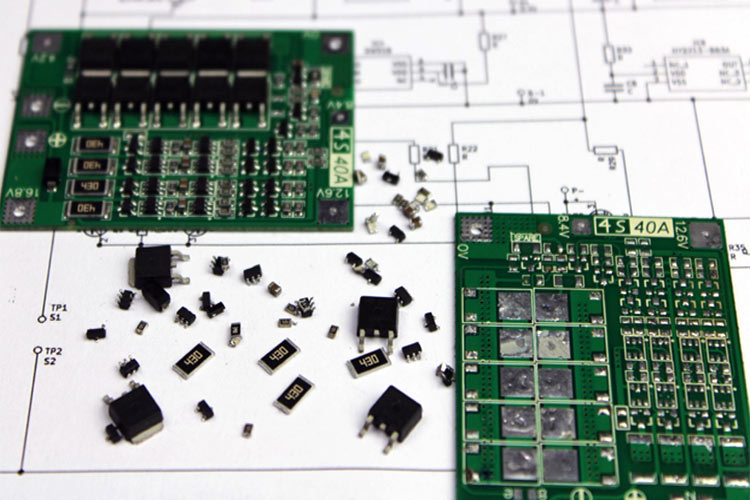
The 4S 40A Lithium-Ion Battery Management and Protection Module (BMS) is designed to safeguard a series configuration of four 18650 lithium-ion cells. At its core, the system continuously monitors the voltage and current parameters of each individual cell layer and the combined pack to prevent catastrophic failure modes. Using a digital multimeter, an engineer can verify cell balancing voltages and operational thresholds across the board terminals. The module relies on precision analog switching and integrated control circuitry to govern charging and discharging paths. When charging, the BMS ensures that no single cell exceeds its maximum safe voltage limit by shunting excess current or halting the charge cycle. During discharge, if the 40A current threshold is exceeded—such as during a sudden short circuit or heavy motor load—the onboard protection switches swiftly disconnect the load to prevent overheating. Soldering equipment is required to securely wire the 18650 cells to the designated B-, B1, B2, B3, and B+ balancing pads, ensuring low-resistance connections capable of handling high continuous currents. Through continuous active monitoring of cell voltage differentials, the module maintains pack longevity, prevents deep discharge, and mitigates safety risks associated with high-density energy storage.
Why Build This
Design and assemble safe, high-capacity 4S lithium-ion battery packs for electric vehicle power systems and portable energy storage.
Implement robust over-current, short-circuit, and over-voltage protection mechanisms suitable for high-draw DIY power tool applications.
Analyze complex analog protection schematics and verify circuit behavior using precision diagnostic tools like multimeters.
Real-World Application
Battery pack safety, electric vehicle power systems, portable energy storage, cordless power tools, and DIY lithium-ion battery assemblies.
Skills You'll Learn
Lithium-ion pack assembly
power electronics safety
schematic reverse-engineering
multimeter voltage and continuity testing
high-current soldering techniques
battery protection circuit analysis
Safety Precautions
Exercise extreme caution when working with multi-cell lithium-ion battery packs to prevent short circuits, high current discharge, thermal runaway, and potential fire hazards.
Technology Tags
LITHIUM ION BATTERY
BMS
BATTERY MANAGEMENT SYSTEM
DW01-A
HY2212 BB3A
MOSFET
CIRCUIT SCHEMATICS
TEARDOWN
Frequently Asked Questions
Connecting the balance wires (B-, B1, B2, B3, B+L) in the correct sequence ensures that the integrated control IC does not experience over-voltage conditions across its sensitive differential inputs during assembly.
No, this specific module is hard-coded and designated as a 4S system, meaning it expects exactly four series-connected 18650 cells to correctly evaluate voltage thresholds.
You will need a digital multimeter to measure individual cell voltages, check continuity, and verify output voltages across the P+ and P- terminals before connecting any load.
Gallery
This page is part of Kitkraft's Project Hub — a curated collection of electronics & robotics projects gathered from the maker community to help students and hobbyists discover and learn to build. Kitkraft does not claim authorship of the original project, and makes no representation as to the accuracy, completeness or safety of third-party source material. The summary and "How It Works" explanation above are AI-generated, rewritten with reference to the original tutorial — not a reproduction of it. Full credit and a direct link to the original source are provided above. If you're the original creator and have a concern about how your work is represented here, please contact us and we'll address it promptly.
 1200mAh 18650 Li-ion Bat – Reliable 3.7V Power Cell
Rs. 129.00
 400 Points Mini Solderless Prototype PCB Breadboard High Quality
Rs. 89.00
 MB102 Adjustable Breadboard Power Supply Module (3.3V & 5V) for Arduino & Raspberry Pi
Rs. 139.00
 Jumper Wire 10 Pin Male To Male 20cm
Rs. 45.00
 Jumper Wire 10 Pin Male To Female 20cm
Rs. 45.00


