Project Hub
/Basic Analog & Power Electronics/Power Supplies & Voltage Regulators/Smallest NeoPixel RGB LED Controller with IoT
Intermediate
INDUSBOARD
Project Specific
3 – 6 Hours
Partial Kit
Smallest NeoPixel RGB LED Controller with IoT
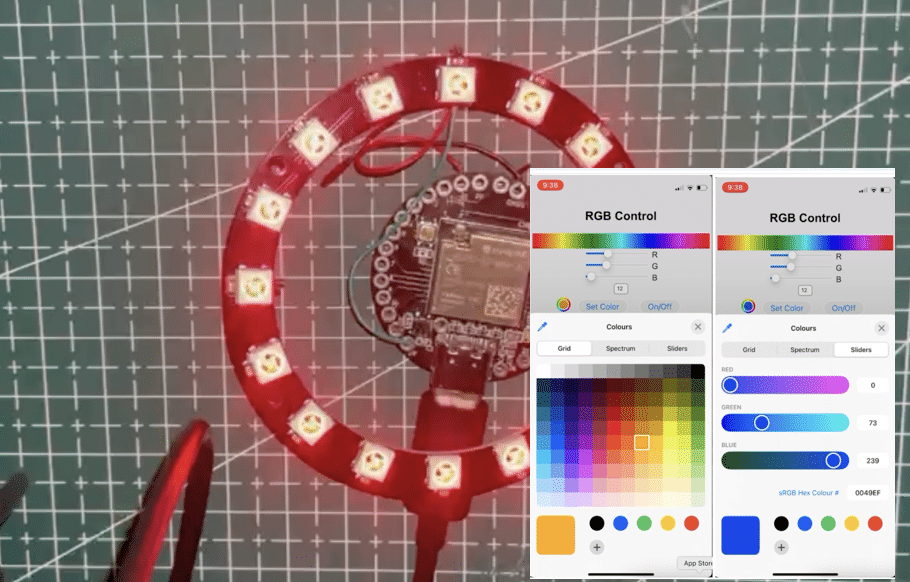
Build an IoT-enabled NeoPixel RGB LED controller using the IndusBoard Coin V2 and a WS2812B NeoPixel LED ring, featuring web-based color and brightness control.
This project is sourced from another site, not written by us — this list is our best match of their components against what we stock, not a verified bill of materials. Always check the original blog (linked above) for the actual parts list before buying.
This project integrates the IndusBoard Coin V2 microcontroller with a WS2812B NeoPixel LED ring to create a compact, internet-connected lighting system. The IndusBoard Coin V2 features integrated Wi-Fi capabilities, allowing it to host a local web server using standard libraries like WiFi.h and WebServer.h. When a user interacts with the web interface hosted on the microcontroller, HTTP requests are processed by the IndusBoard to determine the desired color and brightness settings. The microcontroller then translates these parameters into the precise single-wire data protocol required by the WS2812B NeoPixel LEDs, utilizing the Adafruit NeoPixel library. Each individual LED in the WS2812B ring contains an integrated driver IC that interprets the incoming data stream, latching the color data for its own red, green, and blue elements while passing the remaining data down the chain. Because addressable LEDs draw significant current depending on the number of active pixels and their brightness levels, a dedicated 5V, 2A power supply ensures stable operation, preventing voltage sags that can cause microcontroller resets or erratic LED behavior.
Why Build This
Design custom IoT smart home lighting fixtures that integrate with local web interfaces.
Develop interactive visual displays and aesthetic art installations controlled remotely via Wi-Fi.
Smart home lighting, interactive visual displays, wearable technology, and aesthetic art installations.
Skills You'll Learn
Microcontroller Wi-Fi configuration
embedded web server hosting
single-wire serial data protocol implementation
addressable LED array management
power distribution and voltage regulation
Safety Precautions
Ensure the recommended 5V, 2A power supply is used to prevent voltage drops or overloading when powering multiple LEDs.
Technology Tags
IOT
WS2812B NEOPIXEL
ESP32
WI-FI
WEB SERVER
ADAFRUIT NEOPIXEL LIBRARY
SMART LIGHTING
Frequently Asked Questions
USB power is typically limited in current output and can cause voltage drops or trigger safety cutoffs if you drive many LEDs at high brightness. It is strongly recommended to use a dedicated 5V, 2A power supply for the LED ring.
You will need the Arduino IDE installed on your computer, along with the Adafruit NeoPixel Library, WiFi.h, and WebServer.h libraries included in your sketch.
Once the IndusBoard connects to your local Wi-Fi network using the credentials provided in your sketch, the serial monitor will display its IP address, which you can enter into any web browser on the same network to control the LEDs.
Gallery
This page is part of Kitkraft's Project Hub — a curated collection of electronics & robotics projects gathered from the maker community to help students and hobbyists discover and learn to build. Kitkraft does not claim authorship of the original project, and makes no representation as to the accuracy, completeness or safety of third-party source material. The summary and "How It Works" explanation above are AI-generated, rewritten with reference to the original tutorial — not a reproduction of it. Full credit and a direct link to the original source are provided above. If you're the original creator and have a concern about how your work is represented here, please contact us and we'll address it promptly.
Kitkraft Project Hub — curated from the maker community, credited at the source.
 MB102 Adjustable Breadboard Power Supply Module (3.3V & 5V) for Arduino & Raspberry Pi
Rs. 139.00
 400 Points Mini Solderless Prototype PCB Breadboard High Quality
Rs. 89.00
 Jumper Wire 10 Pin Male To Male 20cm
Rs. 45.00
 Jumper Wire 10 Pin Male To Female 20cm
Rs. 45.00


