A standalone emulation platform based on the RP2040 designed to run 1970s vintage computers and operating systems like the PDP11, Z80 CP/M, and Apple 1.
This project is sourced from another site, not written by us — this list is our best match of their components against what we stock, not a verified bill of materials. Always check the original blog (linked above) for the actual parts list before buying.
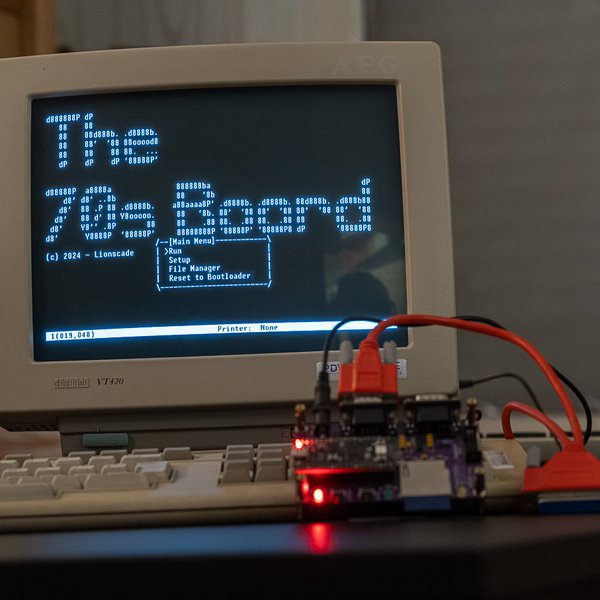
The Seventies Board operates as a hardware emulation platform powered by an RP2040 microcontroller custom PCB designed to recreate the computational environments of 1970s vintage computer systems. At its core, the RP2040 executes custom firmware specifically compiled to simulate the instruction sets and architectural behaviors of historical systems like the PDP-11, Z80 CP/M environments, and the Apple 1. Because these vintage machines relied heavily on physical disk storage and user terminals, the system utilizes an onboard SD card interface to host disk images that act as virtual storage media, allowing users to boot operating systems, load applications, and save persistent data just as original users did decades ago. Interaction with these emulated environments occurs via a terminal or serial interface, which establishes a communication link between the host PC and the RP2040, translating modern keystrokes and display outputs into the appropriate serial data streams expected by the emulated vintage operating systems. By leveraging the fast clock speeds and flexible programmable input/output (PIO) state machines of the RP2040, the custom PCB successfully bridges the gap between modern microcontroller hardware and low-level historical computer architectures without requiring complex multi-chip emulation boards.
Why Build This
Analyze foundational computer architecture and historical operating systems through hands-on interaction with emulated 1970s hardware.
Preserve vintage computing software and disk images in a portable, modern hardware format.
Experiment with microcontroller-based system emulation, serial communication protocols, and storage media integration at an undergraduate engineering level.
Real-World Application
Retrocomputing preservation, education in computer architecture and historical operating systems, and hobbyist computing platforms.
Skills You'll Learn
Microcontroller firmware flashing
serial terminal communication
SD card filesystem handling
hardware system emulation
disk image management
Safety Precautions
No specific precautions noted for this build — always follow general electronics safety practices.
Technology Tags
EMULATION
PDP11
Z80
CP/M
FUZIX
APPLE 1
RETROCOMPUTING
TUI
MICROCONTROLLERS
Frequently Asked Questions
The board is designed to run vintage 1970s computer architectures and operating systems, specifically including the PDP-11, Z80 CP/M, and Apple 1 environments.
You load software by placing the appropriate disk images onto an SD card, which is then inserted into the board's SD card slot for the firmware to read.
No, user interaction typically occurs through a terminal or serial interface connected via a computer, which handles the input and output display for the emulated system.
Gallery
This page is part of Kitkraft's Project Hub — a curated collection of electronics & robotics projects gathered from the maker community to help students and hobbyists discover and learn to build. Kitkraft does not claim authorship of the original project, and makes no representation as to the accuracy, completeness or safety of third-party source material. The summary and "How It Works" explanation above are AI-generated, rewritten with reference to the original tutorial — not a reproduction of it. Full credit and a direct link to the original source are provided above. If you're the original creator and have a concern about how your work is represented here, please contact us and we'll address it promptly.
Kitkraft Project Hub — curated from the maker community, credited at the source.
 ADIY FLY Pico RP2040 Basic Board (Type C)
Out of stock
 400 Points Mini Solderless Prototype PCB Breadboard High Quality
Rs. 89.00
 MB102 Adjustable Breadboard Power Supply Module (3.3V & 5V) for Arduino & Raspberry Pi
Rs. 139.00
 Jumper Wire 10 Pin Male To Male 20cm
Rs. 45.00
 Jumper Wire 10 Pin Male To Female 20cm
Rs. 45.00


