A device designed to measure the intensity of ultraviolet (UV) rays generated by various light sources and electronics using an Arduino and a specialized UV sensor.
This project is sourced from another site, not written by us — this list is our best match of their components against what we stock, not a verified bill of materials. Always check the original blog (linked above) for the actual parts list before buying.
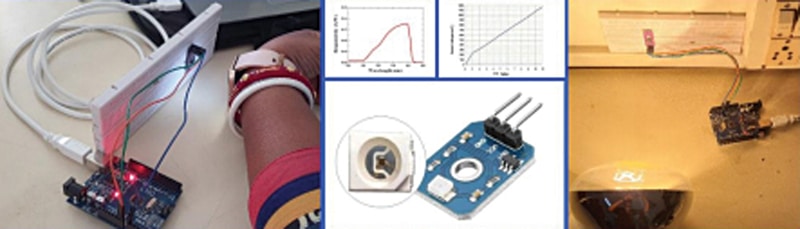
The UV Radiation Testing Device operates by interfacing the GUVA-S12SD ultraviolet sensor with an Arduino board. The GUVA-S12SD sensor contains a photodiode sensitive to the UV spectrum, primarily UVA and UVB radiation, and outputs an analog voltage that scales proportionally with the measured UV light intensity. This analog signal is routed from the sensor to one of the Arduino's analog input pins. Using the Arduino IDE software, the microcontroller runs code that continuously samples this analog voltage via its internal Analog-to-Digital Converter (ADC). The board reads the raw digital value corresponding to the voltage level and applies mathematical conversions to map the reading back to a meaningful metric, such as UV Index or milliwatts per square centimeter. The entire circuit is temporarily assembled on a breadboard to manage power and signal distributions easily, utilizing standard connection wires to link the Arduino's power supply and ground rails to the sensor. A stable external power source energizes the system, enabling portable or benchtop data acquisition. While this setup captures real-time telemetry locally, advanced telemetry configurations can further transmit these logged values for remote monitoring.
Why Build This
Evaluate consumer electronics and household appliances for potential ultraviolet emissions.
Quantify the output intensity of specialized UV sanitization lamps to verify operational effectiveness.
Conduct empirical research and public health awareness studies regarding ambient solar or artificial UV exposure limits.
Real-World Application
Measuring UV intensity from sanitization lamps, evaluating consumer electronics for UV emissions, public health awareness, and testing exposure limits.
Skills You'll Learn
Analog sensor interfacing
ADC signal conversion
voltage-to-metric data mapping
basic breadboard prototyping
microcontroller data acquisition
Safety Precautions
Exercise caution when dealing with UV-C lamps and high-intensity ultraviolet radiation sources to prevent skin and eye damage.
Technology Tags
ARDUINO
UV SENSOR
GUVA-S12SD
SENSORS
MEASUREMENT
ANALOG CIRCUITRY
Frequently Asked Questions
The sensor is primarily designed to detect UVA and UVB bands of the ultraviolet spectrum.
No, because the sensor outputs a simple analog voltage, you can read it directly using standard Arduino functions like analogRead() without installing external libraries.
The base configuration focuses on local telemetry and data logging, but you can integrate additional communication modules to achieve remote IoT logging.
Gallery
This page is part of Kitkraft's Project Hub — a curated collection of electronics & robotics projects gathered from the maker community to help students and hobbyists discover and learn to build. Kitkraft does not claim authorship of the original project, and makes no representation as to the accuracy, completeness or safety of third-party source material. The summary and "How It Works" explanation above are AI-generated, rewritten with reference to the original tutorial — not a reproduction of it. Full credit and a direct link to the original source are provided above. If you're the original creator and have a concern about how your work is represented here, please contact us and we'll address it promptly.
Kitkraft Project Hub — curated from the maker community, credited at the source.
 Jumper Wire 10 Pin Male To Male 20cm
Rs. 45.00
 MB102 Adjustable Breadboard Power Supply Module (3.3V & 5V) for Arduino & Raspberry Pi
Rs. 139.00
 400 Points Mini Solderless Prototype PCB Breadboard High Quality
Rs. 89.00
 Jumper Wire 10 Pin Male To Female 20cm
Rs. 45.00


