This project is sourced from another site, not written by us — this list is our best match of their components against what we stock, not a verified bill of materials. Always check the original blog (linked above) for the actual parts list before buying.
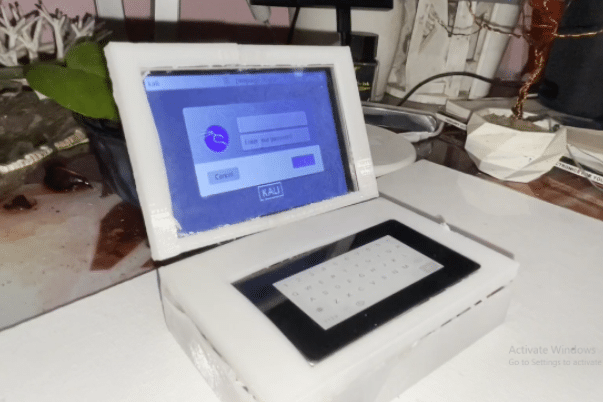
This compact computing system integrates a Raspberry Pi 4 Model B running Kali Linux OS for ARM, serving as the central processing unit and software environment. Power is supplied and managed via an onboard battery and charging system, making the device entirely portable. For visual output and primary user interaction, a 3.5-inch HDMI-based touch display connects directly to the Raspberry Pi's video and interface pipelines. Additionally, a secondary SPI touch e-ink display is integrated to function as a specialized keyboard panel. Operating system images and utility tools are stored on an SD card and expanded using a USB drive. All of these core electronic components are housed securely inside custom 3D printed case parts, specifically designed with a base, top, and front to align the displays, ports, and internal wiring into a cohesive handheld form factor. Through this hardware integration, users can execute advanced networking and security software packages—such as Wireshark, Metasploit, and Aircrack-ng—directly on a fully mobile, self-contained Linux workstation.
Why Build This
Develop a custom, pocket-sized penetration testing workstation tailored for undergraduate engineering portfolio demonstrations.
Gain hands-on hardware integration experience by combining embedded Linux single-board computers with dual distinct displays and custom 3D-printed enclosures.
Deploy specialized cybersecurity software toolsets in a portable physical form factor suited for field communications and mobile computing analysis.
Real-World Application
Portable penetration testing, ethical hacking, secure field communications, and compact mobile computing for cybersecurity professionals.
Skills You'll Learn
Embedded Linux operating system deployment
HDMI display integration
SPI interface configuration
power management system assembly
3D printed enclosure mechanical fitting
cybersecurity toolchain utilization
Safety Precautions
Flagged during content review — not in the original source
Handle the internal battery and charging system with care to prevent short circuits, punctures, or thermal runaway, and ensure proper ventilation within the 3D-printed enclosure to avoid component overheating.
Technology Tags
RASPBERRY PI
KALI LINUX
3D PRINTING
ETHICAL HACKING
EMBEDDED SYSTEMS
LINUX TERMINAL
HARDWARE DESIGN
TOUCH KEYBOARD
Frequently Asked Questions
Yes, the Raspberry Pi 4 Model B features standard HDMI ports, allowing you to connect an external monitor for troubleshooting or desktop use, though it will temporarily reduce the device's portability.
You use a computer with the Raspberry Pi disk imager software to flash the Kali Linux OS for ARM image directly onto the SD card before inserting it into the board.
It requires enabling the SPI interface within the Raspberry Pi configuration settings and installing the appropriate drivers or software overlays to register touch inputs correctly as a virtual keyboard layout.
Gallery
This page is part of Kitkraft's Project Hub — a curated collection of electronics & robotics projects gathered from the maker community to help students and hobbyists discover and learn to build. Kitkraft does not claim authorship of the original project, and makes no representation as to the accuracy, completeness or safety of third-party source material. The summary and "How It Works" explanation above are AI-generated, rewritten with reference to the original tutorial — not a reproduction of it. Full credit and a direct link to the original source are provided above. If you're the original creator and have a concern about how your work is represented here, please contact us and we'll address it promptly.
 Raspberry Pi 3 - Model B+ 1.4Ghz 64-bit quad-core Processor with 1 GB Ram (Original)
Rs. 5,400.00
 400 Points Mini Solderless Prototype PCB Breadboard High Quality
Rs. 89.00
 MB102 Adjustable Breadboard Power Supply Module (3.3V & 5V) for Arduino & Raspberry Pi
Rs. 139.00
 Jumper Wire 10 Pin Male To Male 20cm
Rs. 45.00
 Jumper Wire 10 Pin Male To Female 20cm
Rs. 45.00


