This project is sourced from another site, not written by us — this list is our best match of their components against what we stock, not a verified bill of materials. Always check the original blog (linked above) for the actual parts list before buying.
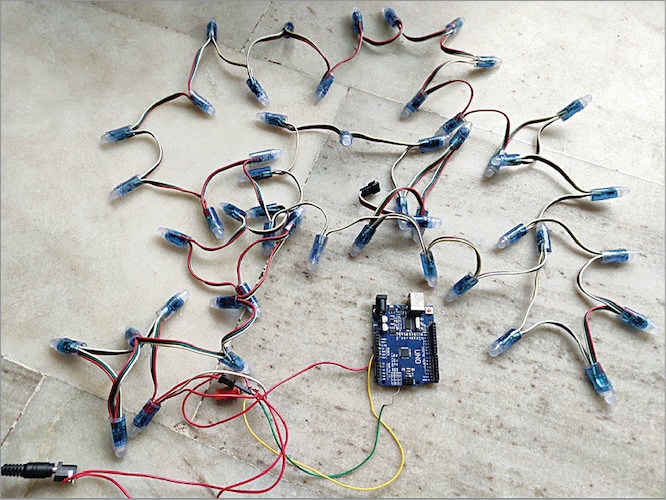
The NeoPixel LED Lighting Using Arduino project revolves around a centralized control loop executed by an Arduino Uno board interfacing with an addressable WS2811/NeoPixel LED strip or array. Powering the system requires a dedicated 5V DC power supply capable of providing sufficient current to drive multiple RGB LEDs simultaneously, with power distributed along the rails while maintaining a shared common ground with the Arduino. The Arduino generates a precise, single-wire timing protocol signal via a digital output pin, communicating color and brightness data sequentially down the data line of the NeoPixel strip. Software loaded onto the microcontroller—compiled through the Arduino IDE utilizing either the FastLED or Adafruit NeoPixel library—interprets programmed algorithms to dynamically shift RGB values across individual pixels. As the data packet travels through the embedded shift registers within each LED chip on the strip, specific color commands are latched locally while remaining data is passed downstream. This enables independent manipulation of every pixel's hue and intensity, allowing the system to render complex animated sequences, smooth color transitions, and custom lighting patterns based entirely on the executed microcontroller code.
Why Build This
Design programmable ambient illumination systems for smart agricultural or greenhouse monitoring stations.
Prototype digital status indicators and custom signaling arrays for embedded engineering instrumentation.
Experiment with microcontroller-driven single-wire communication protocols for undergraduate design portfolios.
Real-World Application
Custom decorative lighting, ambient room illumination, digital signage, and interactive art installations.
Skills You'll Learn
Single-wire serial communication protocols
digital output signal timing
power distribution and current management in embedded circuits
software library integration
addressable LED array mapping
Safety Precautions
Ensure correct voltage supply (5V DC) and proper wiring connections to prevent damage to the Arduino and the NeoPixel LED strip.
Technology Tags
NEOPIXEL
WS2811
LED LIGHTING
RGB
PWM
MICROCONTROLLERS
ARDUINO
FASTLED
Frequently Asked Questions
For a very short strip with only a few LEDs at low brightness, yes. However, longer NeoPixel strips draw too much current and can damage the Arduino's onboard voltage regulator, so a separate 5V DC power supply tied to a common ground is recommended.
Both libraries are fully compatible with the Arduino IDE for this project. NeoPixel is typically easier for absolute beginners to grasp, while FastLED offers more advanced color correction and mathematical animation functions.
While the basic setup requires just connecting wires, adding a 300 to 500-ohm resistor on the data line and a 1000µF capacitor across the 5V power supply helps protect against voltage spikes and signal distortion.
Gallery
This page is part of Kitkraft's Project Hub — a curated collection of electronics & robotics projects gathered from the maker community to help students and hobbyists discover and learn to build. Kitkraft does not claim authorship of the original project, and makes no representation as to the accuracy, completeness or safety of third-party source material. The summary and "How It Works" explanation above are AI-generated, rewritten with reference to the original tutorial — not a reproduction of it. Full credit and a direct link to the original source are provided above. If you're the original creator and have a concern about how your work is represented here, please contact us and we'll address it promptly.
 MB102 Adjustable Breadboard Power Supply Module (3.3V & 5V) for Arduino & Raspberry Pi
Rs. 139.00
 Jumper Wire 10 Pin Male To Male 20cm
Rs. 45.00
 400 Points Mini Solderless Prototype PCB Breadboard High Quality
Rs. 89.00
 Jumper Wire 10 Pin Male To Female 20cm
Rs. 45.00


