Build a low-cost water turbidity meter using an Arduino and an OLED screen to measure water clearness and display status readings like clean, cloudy, or dirty.
This project is sourced from another site, not written by us — this list is our best match of their components against what we stock, not a verified bill of materials. Always check the original blog (linked above) for the actual parts list before buying.
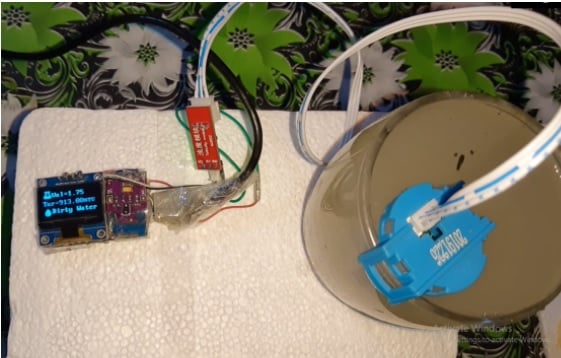
The Water Turbidity Meter operates by measuring the optical light transmittance and scattering caused by suspended particles in a liquid sample. At the heart of the system is an Arduino Uno connected to a turbidity sensor paired with a signal amplifier module. The sensor probe, which contains an infrared transmitter and a receiver, is submerged in the water. When light passes through the water, particles cause it to scatter. The receiver detects the remaining unscattered light and converts it into an analog voltage output. This analog signal is routed through the signal amplifier module, which conditions the electrical output before it is read by one of the Arduino's analog-to-digital converter (ADC) pins. The Arduino processes this raw voltage value, mapping the electrical characteristics to relative clearness levels. Once the measurement is calculated, the Arduino communicates with an OLED display screen using the u8g2 library. The screen renders real-time status readings—such as clean, cloudy, or dirty—allowing users to instantly interpret the water quality without needing an external computer serial monitor.
Why Build This
Design and deploy an affordable, microcontroller-based water quality monitoring node suitable for undergraduate environmental engineering field studies.
Integrate analog sensor data acquisition with visual OLED status output for real-time aquatic ecosystem analysis in aquariums or small ponds.
Implement digital signal processing techniques on an Arduino Uno to translate raw voltage readings into actionable water clarity classifications.
Real-World Application
Monitoring water quality in ponds, lakes, aquariums, washing machines, and sewage treatment systems.
Skills You'll Learn
Analog sensor interfacing
ADC voltage reading and mapping
OLED display integration
u8g2 graphics library usage
modular hardware wiring
Safety Precautions
No specific precautions noted for this build — always follow general electronics safety practices.
Technology Tags
ARDUINO
SENSORS
OLED DISPLAY
WATER QUALITY
TURBIDITY SENSOR
ENVIRONMENTAL MONITORING
Frequently Asked Questions
You can calibrate the sensor by taking baseline voltage readings in completely clear distilled water and highly turbid reference water, then mapping those voltage boundaries in your Arduino code.
The u8g2 library provides robust communication protocols and memory management needed to drive various monochrome OLED screens efficiently on resource-limited microcontrollers like the Arduino Uno.
The electronic probe portion designed for liquid contact is generally water-resistant, but the signal amplifier module, jumper cables, and Arduino board must be kept completely dry and housed safely away from splashes.
This page is part of Kitkraft's Project Hub — a curated collection of electronics & robotics projects gathered from the maker community to help students and hobbyists discover and learn to build. Kitkraft does not claim authorship of the original project, and makes no representation as to the accuracy, completeness or safety of third-party source material. The summary and "How It Works" explanation above are AI-generated, rewritten with reference to the original tutorial — not a reproduction of it. Full credit and a direct link to the original source are provided above. If you're the original creator and have a concern about how your work is represented here, please contact us and we'll address it promptly.
 0.96 Inch I2C/IIC 4pin OLED Display Module White
Rs. 349.00
 Jumper Wire 10 Pin Male To Male 20cm
Rs. 45.00
 MB102 Adjustable Breadboard Power Supply Module (3.3V & 5V) for Arduino & Raspberry Pi
Rs. 139.00
 400 Points Mini Solderless Prototype PCB Breadboard High Quality
Rs. 89.00
 Jumper Wire 10 Pin Male To Female 20cm
Rs. 45.00


