Project Hub/Test & Measurement Instrumentation/Oscilloscopes & Logic Analyzers/DIY ESP32 Oscilloscope
Intermediate
ESP32
₹1,500 – ₹5,000
6 – 12 Hours
DIY ESP32 Oscilloscope
Build an affordable, compact DIY oscilloscope using an ESP32 microcontroller and a 1.69-inch TFT display for basic signal analysis and waveform monitoring.
Originally published by Jobit Joseph on CircuitDigest
View original tutorial
How It Works
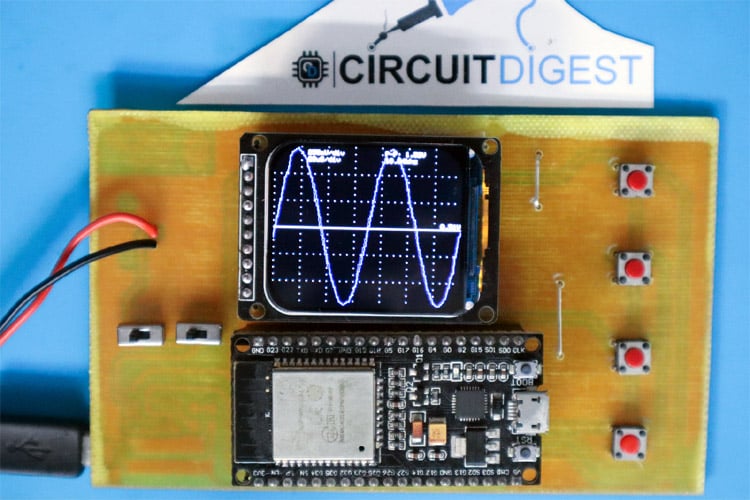
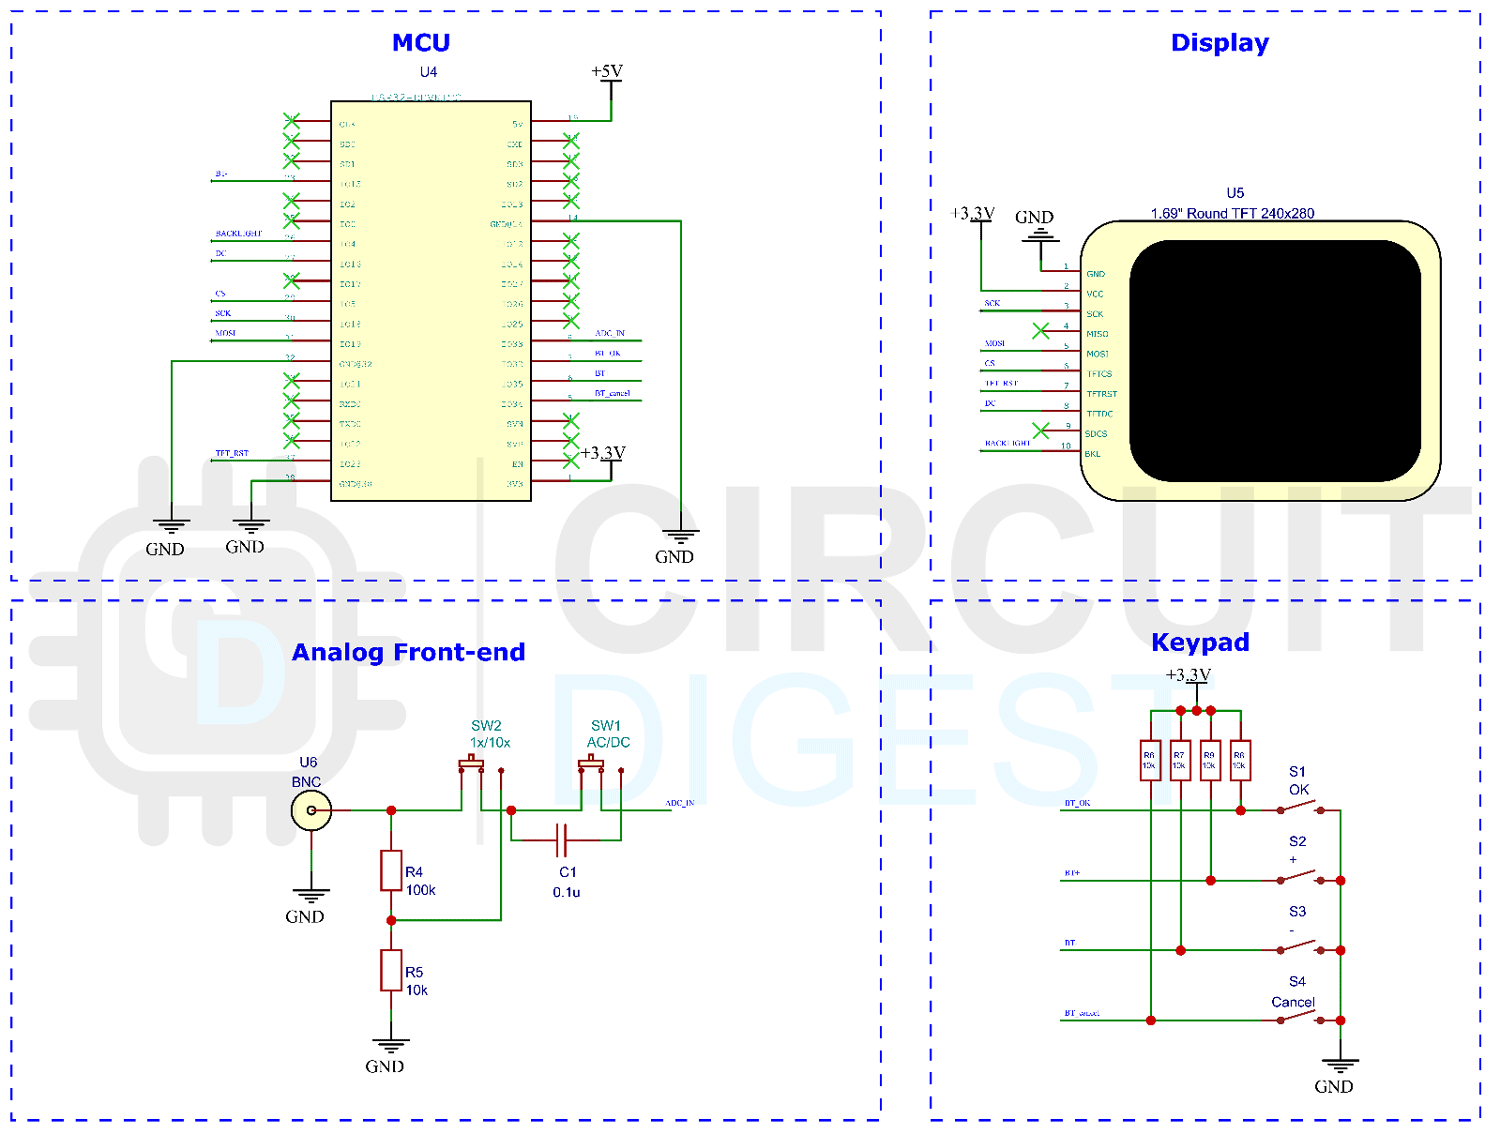
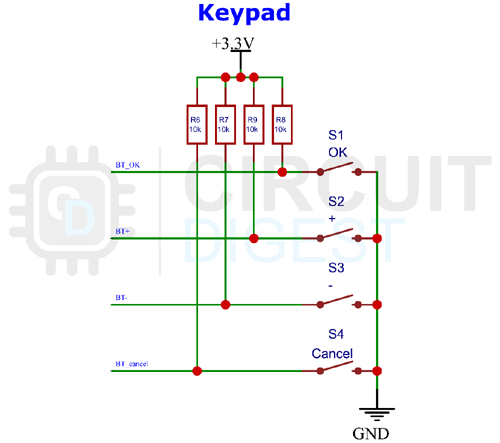
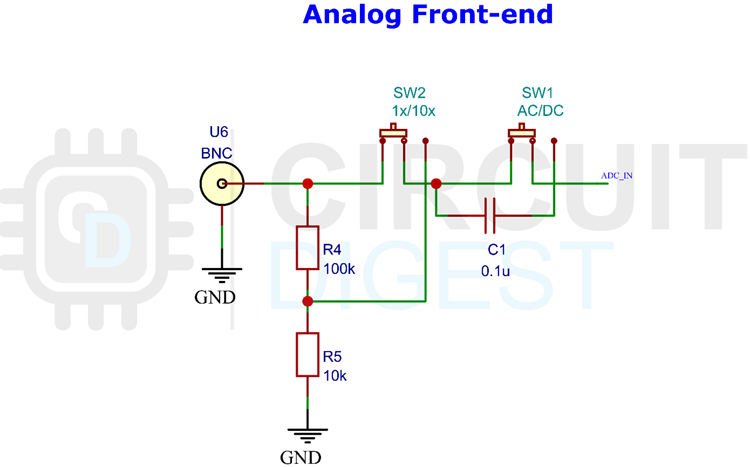
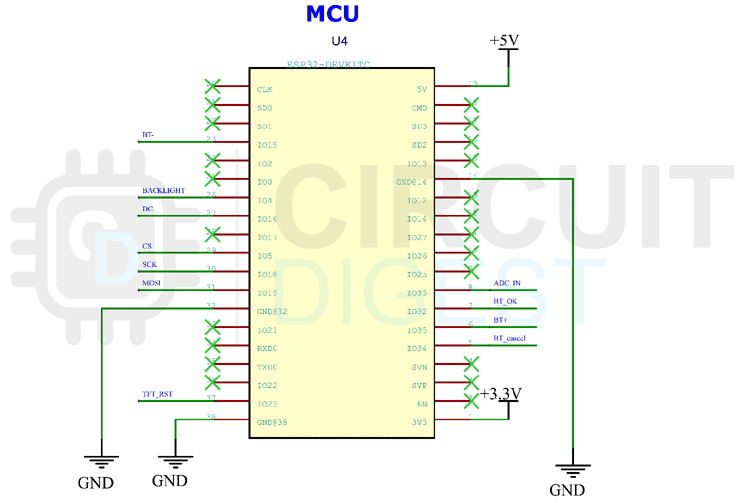
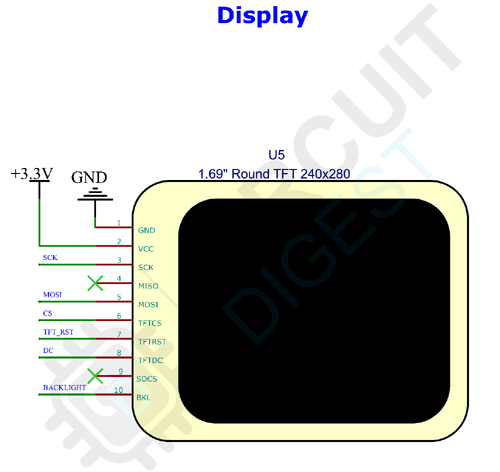
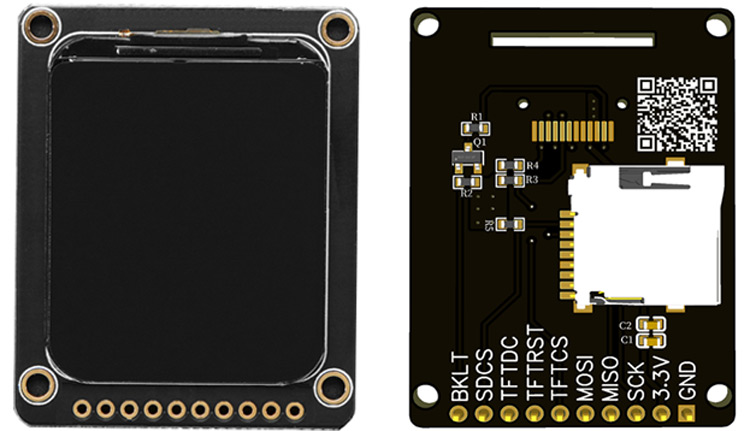
The DIY ESP32 Oscilloscope functions by sampling analog electrical signals through one of the ESP32 microcontroller's internal Analog-to-Digital Converter (ADC) pins. To protect the microcontroller and scale the input appropriately, incoming signals pass through a front-end voltage divider circuit constructed from a 100K resistor and a 10K resistor, alongside a 100nF ceramic capacitor that helps filter out high-frequency noise. Once the analog voltage is digitized by the ESP32, the microcontroller processes the data stream into waveform coordinate arrays. The user interacts with the system using six 6mm tactile switches and two SPDT switches to control settings such as timebase, trigger levels, and voltage scaling. Finally, the processed waveform and user interface menus are rendered graphically in real-time onto the compact 1.69-inch TFT display using the ST7789s driver. The entire system is assembled neatly on a custom copper clad PCB or perfboard, bringing together processing, user controls, and visual feedback into a single handheld testing instrument.
Why Build This
Gain a practical, hands-on lab instrument for troubleshooting school science experiments and microcontroller sensor projects without needing expensive commercial benchtop gear.
Learn how microcontrollers convert real-world analog voltage changes into digital data and render them onto a graphical color display screen.
Build a portable, self-contained diagnostic tool that allows you to visually test audio signals, pulse widths, and low-frequency sensor outputs directly on your workbench.
Real-World Application
Used by hobbyists, students, and engineers for low-frequency signal analysis, audio waveform testing, sensor output debugging, and educational electronics troubleshooting without purchasing expensive commercial lab equipment.
Skills You'll Learn
Analog-to-digital conversion
voltage divider design
signal filtering with ceramic capacitors
SPI display interfacing
microcontroller GPIO input handling
Safety Precautions
Do not connect this oscilloscope directly to high-voltage mains (120/230V AC) or high-energy circuits. The device is not isolated and max safe input voltage with the divider is approximately 33V peak.
Technology Tags
ESP32
ADC SAMPLING
I2S BUFFER
TFT DISPLAY
SPI
INTERRUPT HANDLING
SIGNAL PROCESSING
PCB DESIGN
Ready to build this?
We stock the boards, sensors and modules this project needs. A full parts list is coming soon — for now, browse our DIY Kits & components or search for ESP32 parts.
Frequently Asked Questions
What is the maximum safe input voltage I can measure with this oscilloscope?
Due to the onboard resistor voltage divider circuit, the maximum safe input voltage is approximately 33V peak. Never connect this device to high-voltage mains power.
What software do I need to program the ESP32 board?
You will need the Arduino IDE installed on your computer, along with the ESP32 Board Manager package and a modified version of the TFT_eSPI library to run the display.
Can I use this device to measure high-frequency radio signals?
No, this DIY oscilloscope is designed for low-frequency signal analysis, audio waveform testing, and basic sensor output debugging rather than high-frequency RF measurements.
Gallery
Kitkraft Project Hub — curated from the maker community, credited at the source.
PRJ-00613